
Ox Stones - Peak District Walk
Sunday 17th September 2017
A late start meant this walk started with us joining the crowds along Stanage Edge, but by the time we got to Burbage Rocks the crowds had long since headed home and we had the edge to ourselves.
Start: Upper Burbage Bridge (SK 2594 8301)
Route: Upper Burbage Bridge - Cowper Stones (TP) - Stanage Edge - Stanedge Pole - White Stones - Brown Edge Farm - Ox Stones (TP) - Houndkirk Road - Burbage Rocks - Upper Burbage Bridge
Distance: 8.5 miles Ascent: 329 metres Time Taken: 5 hrs 5 mins
Terrain: A mix of clear paths and moorland
Weather: Sunshine, wind and rain.
Pub Visited: Millstone Inn, Hathersage Ale Drunk: Black Sheep Bitter

The walk begins with an easy stroll onto the top of Cowper Stone.

As we gain height the view extends across Burbage Moor towards Ox Stones.

Once we are on the top of Cowper Stone we have a view along the length of Stanage Edge.

The trig on the summit of Cowper Stone is the first of two we will visit today.

Looking back towards Higger Tor and Callow Bank.

We also have a good view along the length of the Hope Valley.

Our route will take us along Stanage Edge.

As we walk along the edge Kinder comes into view.

It was difficult to find a spot where it was possible to take a shot of the edge without having any climbers in it.

Our rather late lunchtime view was of Win Hill and Bamford Moor.

Looking back along Stanage Edge towards Cowper Stone, from the shelter of our lunchtime spot.

We followed the Long Causeway from Stanage Edge to Stanedge Pole.

Approaching Stanedge Pole.

Once we had passed Stanedge Pole we had a view of White Stones and Rudd Hill.

Redmires Reservoirs actually have some water in them today.

After crossing a stile and following a horrible track through heather and ferns, which we found out later we didn't need to do, we eventualy found ourselves on the clear track heading for White Stones.

Looking across to Redmires Reservoirs from White Stones and hoping that rain wasn't coming our way.

As we reached White Stones the rain caught us up and after putting on our waterproofs and packing away the camera we found ourselves looking at a double rainbow. After some debate the camera came back out for a quick shot in the rain of the two rainbows. We could actually see both ends of each rainbow, but they were so close to us I couldn't get the full rainbows in one shot.
The original plan had been to cut across the access land to gain the summit of Rud Hill but in the rain we must have missed the point where we needed to divert off the track so we ended up following this track to the road and following the path through Brown Edge farm.

Ox Stones is only a few minutes from the main road and well worth the short diversion off the Houndkirk Road.

From Ox Stones it is another easy stroll to the trigpoint.

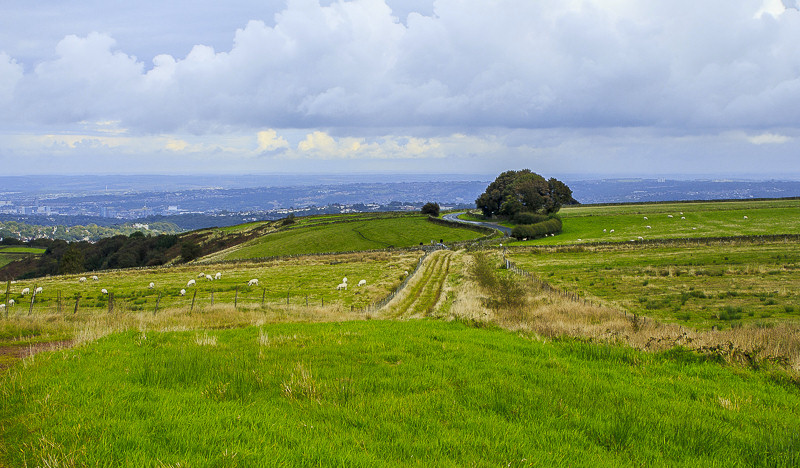
From the trig the views extend across the moors towards the outskirts of Sheffield.

Looking across Houndkirk Moor to Houndkirk Hill, with Blacka Moor behind it.

Houndkirk Road is a nice wide and sandy road that makes for easy going.

Looking along Burbage Rocks, which is the final section of the walk.

Higger Tor from Burbage Rocks.

The heather is fading fast, although some flowers still reamin.

Looking along the valley from the end of Burbage Rocks, it's not looking good for a great sunset tonight.

Higger Tor and Carl Wark from Upper Burbage Bridge, all that remains now is to find a pub for a drink.
All pictures copyright © Peak Walker 2006-2023