
Derwent Edge - Peak District Walk
Wednesday 17th July 2024
Today's walk was planned so I could research the route from Fairholmes to the first checkpoint ready for when I do the Nine Edges Challenge in September. Although I've done Derwent Edge numerous times it is a long time since I've parked at Fairholmes so the start of the route was unfamiliar to me.
Start: Fairholmes car park (SK 1732 8932)
Route: Fairholmes - Hollin Clough - Lost Lad - Back Tor (TP) - Dovestone Tor - White Tor - Derwent Moor - Grindle Clough - Ladybower Reservoir - Fairholmes
Distance: 8 miles Ascent: 448 metres Time Taken: 4 hrs 55 mins
Terrain: Clear paths
Weather: Hot and sunny
Pub Visited: Yorkshire Bridge Inn Ale Drunk: Acorn Brewery, Barnsley Bitter

The first thing I had to work out was how to get out of the car park and down to where the walk will start in front of the dam.

The steps next to the wall were shut so we had to follow the path heading towards Jubilee Cottages before cutting back towards Derwent Reservoir.

There was a short section walking next to Derwent Reservoir.

One of the main things I needed to work out was where the access point to Hollin Clough was, which we walked passed and had to back track to.

It was a steep and sweaty climb up Hollin Clough, just what you want when you start a walk at midday.

We were soon rewarded with views across Ladybower Reservoir to Kinder's plateau.

At the top of Hollin Clough we could look across Green Sitches to Lost Lad, which was on our route today.

Although there was a small path heading in the direction we wanted to go the whole point of today's walk was to check out this section of the Nine Edges route, so we turned right and followed the broad track across the top to a gate.

If nothing else we got to enjoy the view down the Derwent Valley which now included Mam Tor.

We took the clear path across Green Sitches, which did join up with the faint path we had seen at the top of Hollin Clough, so at least I knew which route I'd be following on the Nine Edges Challenge.

Looking across Green Sitches to the route back down to Ladybower I usually use when I do Derwent Edge.

Heading up to Lost Lad I paused to catch my breath and was rewarded with this view across to Rowlee Pasture with the Kinder Plateau beyond it.

The summit of Lost Lad gets a bit closer. As we'd approached Lost Lad a couple had asked us how much further it was to the car park as they'd got lost following their book and also ran out of fluid. We pointed them in the right direction and told them to look out for the grouse butt so they knew where to turn. I hope they made it back okay.

Looking across Howden Moors from the top of Lost Lad.

Looking back along the path we had taken to Lost Lad and across the valley to Birchinlee Pasture.

Looking across to Derwent Edge with the Cakes of Bread visible

Our next target was Back Tor, where we planned on having a late lunch.

As we approached Back Tor we started looking out for a suitable lunch spot out of the breeze.

I passed on visiting the trig this time, I've been up there before.

We sat having lunch looking across Foulstone Moor to Boots Folly and Ughill Moors.

We could also look across to Howden Edge, with Margery Hill just visible behind it.

Lunch over we start to make our way along Derwent Edge, with all the key landmarks in view.

Looking back to the Cakes of Bread and Back Tor as we make our way along Derwent Edge.

The Salt Cellar is the next landmark we will pass once we can move on from Dovestone Tor. John realised here that he'd lost his lens cap and despite back tracking to where he last remembered having it he never found it.

Whilst I wait for him I enjoy the view across Bridge-end Pasture to the Vale of Edale.

Looking back to White Tor as we head towards the Wheel Stones.

As the Wheel Stones get closer Stanage Edge comes into view.

We can also see the path through the ferns we will be using to get back to the path alongside Ladybower.

Looking across to Crook Hill.

Finally passed the Wheel Stones and for once there is no-one sheltering there so I get a shot of them.

We will soon be leaving Derwent Edge and heading downhill as the stake ahead marks the point at which we will turn.

Before we turn and head downhill I take a good look at Stanage Edge, it looks rather long from here.

Looking across to Pike Low as we start to follow the path through the ferns around Grainfoot Clough.

Looking back to Derwent Edge as we make our way through the ferns, which thankfully weren't too dense, so the path was relatively easy going.

The path will take us to the corner of the wood ahead.

Ahead of us we can see Crook Hill, Lose Hill and Rushup Edge, which despite being quite far apart seem close together in this shot.

As we leave the ferns behind us Ladybower Reservoir comes into view.

Looking across to Hagg Side as we continue downhill.

Before we joined the broad track alongside Ladybower we sat at the bottom of the path looking back up to Whinstone Lee Tor.

Once we leave the field all we have to do is follow the broad track back to the car park.

As we make our way along the track we get to look along Ladybower Reservoir.
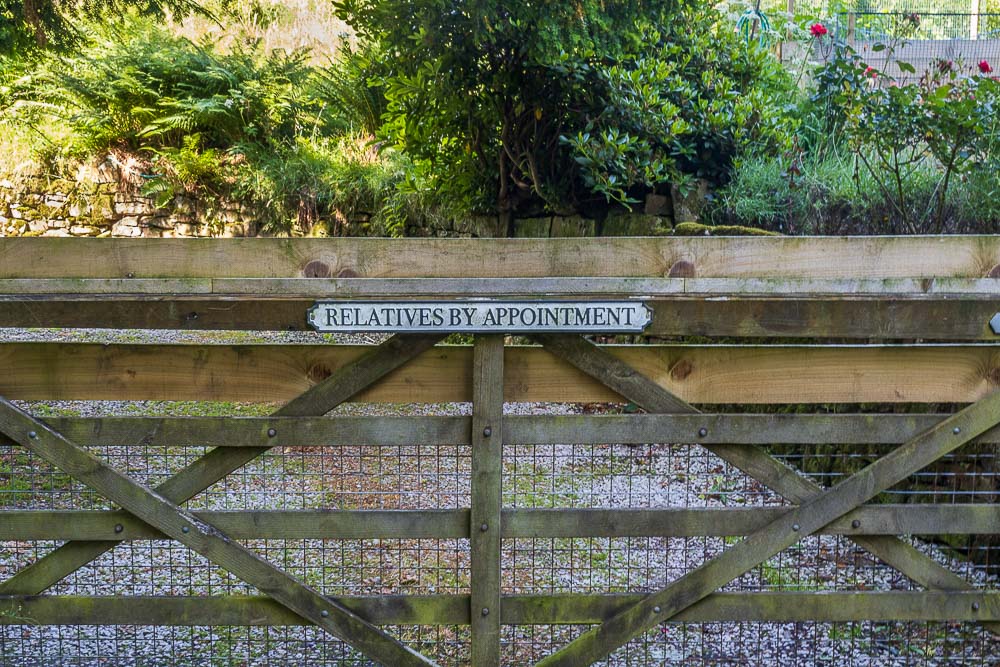
As ever when I go this way I have to take a picture of one of my favourite gate signs.
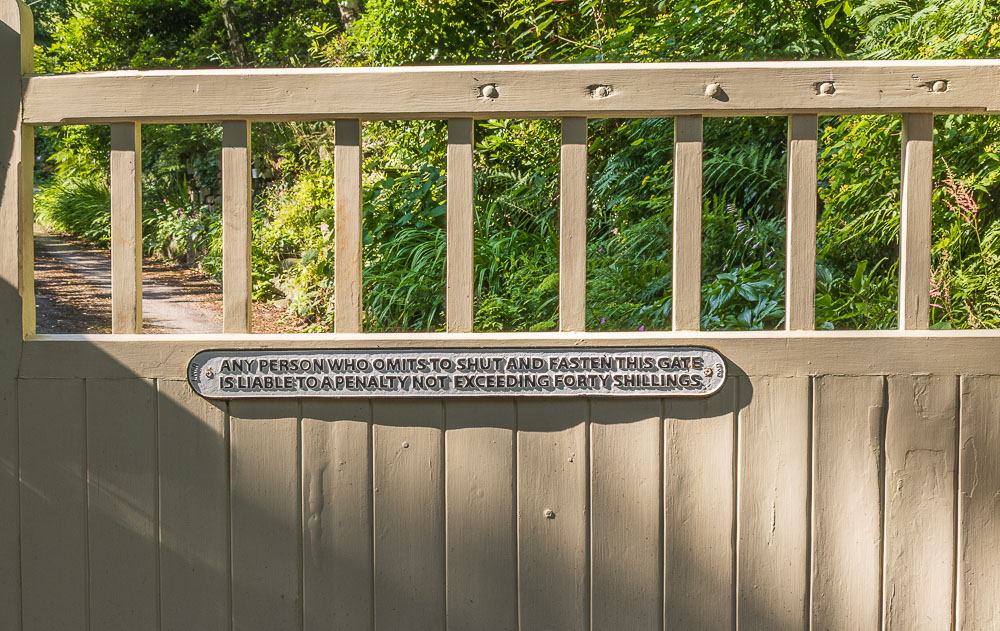
Followed almost immediately by another of my favourite gate signs. At least when we see these we know we are nearly back at the car.
All pictures copyright © Peak Walker 2006-2024